No Till
Submitted by: Submitted by dealey
Views: 379
Words: 555
Pages: 3
Category: Other Topics
Date Submitted: 05/15/2012 03:36 PM
No-Till: Making It Work - Planting Equipment
Author: | OMAFRA Staff |
Creation Date: | 28 May 2002 |
Last Reviewed: | 06 May 2004 |
Table of Contents
1. No-till Planters
2. Available in Published Version of No-till
In no-till, effective crop establishment requires the proper selection of no-till tools or components. Knowing the nuts and bolts of no-till equipment is fundamental to setting up and fine-tuning your equipment to suit your operation.
Because equipment will be your largest investment, it will also be among your best opportunities to save in the long run. Less equipment can do more acres in no-till.
When you bring the planter or drill to the field, you're immediately reminded that the field looks almost the same as when you harvested the previous crop.
Figure 1. Without tillage, no-till planting equipment has to help create favourable seedbed conditions.
Without the benefit of several tillage passes, your planting equipment must:
* cut residue
* move excess residue
* loosen the seedbed for good seed-to-soil contact
* place seed in moist soil
* properly place other inputs
* close planting furrow and adequately press soil around seed.
Failure to meet most or all of these goals will result in uneven germination and emergence. And this can cause further problems with pests and growth during the growing season.
No-till Planters
Planter Setups
To make no-till planters work, you need to concentrate on:
* coulter setup
* uniformity of seeding depth and placement
* weight.
Ensure the planter is adjusted for field conditions.
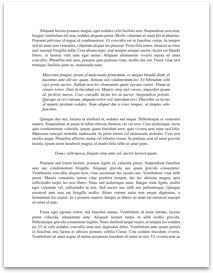
Figure 2. Weight may be added inside the drill or planter frame.
Coulter Blade Selection
In a 2-coulter system:
* choose 5 cm (2") fluted coulters for a wider tilled zone
* a 3 cm (1") fluted coulter will till a narrower zone and leave a finer seedbed.
A combination can be used, e.g., a 3 cm (1") fluted coulter in front of the starter fertilizer, and a 5 cm (2")...
More like this
- No Till
- Till My Heartaches End
- Travon Martin Vs. Emmett Till
- The Kidnapping And Murder Of Emmett Till
- Emmett Till
- Fuel Cell Technology Market By Type By Application And Geography - Global Trends And Forecasts Till 2019
- Us Solar Thermal Power - Market Analysis And Forecast Till 2030
- Renewable Power Market Analysis And Forecast United Kingdom, China, Us, Brazil, India, Philippines, Taiwan Till 2030
- Power Market Analysis And Forecast United Kingdom, China, Us, Brazil, India, Philippines, Taiwan Till 2030
- Asia Pacific Mobile Money Industry Prospects Till 2019